I signed up to demonstrate printmaking at the San Diego County Fair. Watching me draw a new plate for etching is a little like watching grass grow, and isn’t very engaging for Fair attendees, so this year I wanted to do a demo of monotype printmaking. It is a little more painterly and more important, it works up faster.
I decided to use the opportunity as an excuse to work with a set of inks (Akua) designed especially for monotype printmaking as a non-toxic watercolor ink. I had purchased them a couple of years ago and really hated how they handled, compared to my usual process, but I had seen online that others were using them successfully. So I determined to do some practice sessions in the studio and try to make friends with this material. (Art materials are expensive!)
My first attempt was just doodling. Ok, I can see some possibilities here. It looks very grainy, which I am not fond of. With heavier ink and more pressure, it might work for me.

Second attempt, on the press this time, got some nice ink coverage but the pressure was very high to get this smooth look. It was hard work to pull the plate through the press, even on 25:1 gear ratio.

Painted the same composition and used a little less pressure – far too pale and grainy! That is why it is called experimenting!
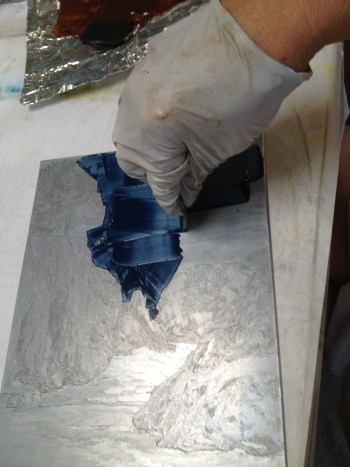
Tried another image – with tighter pressure . This image works well with the grainy quality of the ink. After adding ink to darken select areas defining the rocks on the beach, and running through the press again, this was a passable result.

I feel encouraged that I might make friends with this ink yet! I try one without the press. In the demo situation, I will have to print by hand, using a spoon or a baren to apply pressure.
Although I re-inked and overprinted several times to get to this end, I felt good about the possibilities after printing this image. I turned to making sketches for the demo days.

Since I paint the image on clear plexiglass, it is possible to lay the plate directly on the sketch to guide color application. This sketch was used for the second demo.

On demo day, I had some materials for kids (and parents and teachers!) to play with – so in the end, the first monotype at the Fair did not get completed. I covered the partially painted plate with a second plate and clipped them together. I had heard that these Akua inks stay wet for several days, so I thought, “Why not? I’ll print it at home tomorrow.”

It was a couple of days before I got back to it. Even though I knew it wasn’t “finished”, I thought I better print just to see whether the ink would still work.

I was very pleased that the film of ink was still wet enough to transfer pretty well even after 48 hours.

The composition needed more work, however, so I added a series of layers of additional colors, printing repeatedly until I felt happy with the result.


For my second demo day, I had another flower image. This time the demonstrator table (and the demonstrator!) were in sun a good part of the time. The ink felt like it was drying very fast in the heat and sun, so I printed at the end of two hours.

Alignment for the printing is pretty simple with the clear plexiglass, however it was still useful to tape the paper to the plate for ease and speed of repositioning the paper for subsequent printing.

By adding more color layers, the grainy quality that I don’t like gives way to a richness of color that I do like.
Note that, once I began darkening the background around the flower petals, I actually drew with marker on the back of the plate, tracing the precise placement of some elements as they were already printed.
While the audience thought this looked pretty nice, I know that the “magic” of seeing the print pulled was a big influence on their impression! I took it home and added more layers to enhance the composition over the next few days.
Titleld “Dallas’ Cactus Blossom” after the homeowner in whose beautiful garden I found this lovely specimen.