Julianne Ricksecker with winning art at the Rene Carcan international Prize for Printmaking exhibition, Biblioteca Wittockiana, Brussels, Belgium, February 15, 2018. Photo: Ellen Pontes

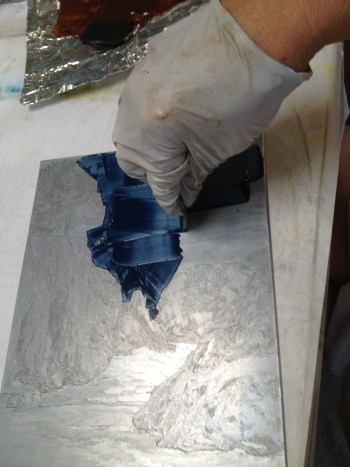
Exciting news!  At the opening reception on February 15, I received the Public Prize Award in the biennial René Carcan International Prize for Printmaking for the 4 original prints that I have on display there! Thanks to all my friends, family and collectors who took the time to go online and vote for my work!

The exhibit is at the Bibliotheca Wittockiana, a museum in Brussels dedicated to book arts, book binding and related disciplines. The show opened February 15th and closes May 15th of 2018.

Enjoy the entire exhibit online here: http://award.renecarcan.be/current_edition

For San Diego locals, you can enjoy 2 of the 4 images at the Del Mar Art Center Gallery until April 30.  The joy of original prints is that they are “multiple originals”, and exist in a limited edition that can be on view in two places at once!

“Last Light” and “Resting on Razor Point Trail” can both be viewed in the gallery, located in the Del Mar Plaza, at the corner of 15th and Camino Del Mar. Gallery hours are Tue – Sat, 11-7 and Sun, 11-6.

Torrey Pine #3, monotype, René Carcan International Public Prize in Printmaking
“Last Light”, etching and aquatint, 8″ x 10″, René Carcan International Public Prize in Printmaking.
Resting on Razor Point Trail”, Etching and Aquatint, 3′ x 3.5″, René Carcan International Public Prize in Printmaking.
Harris Beach, Oregon, Color etching, 10″ x 12″, René Carcan International Public Prize in Printmaking.

Exciting news!  I have been selected as a finalist in the René Carcan International Grand Prize in Printmaking!

All finalists’ art is now posted in the René Carcan website for public voting.  I would love to have your vote for the Public Prize!

When you follow this link, you will see my 4 pieces – you can click on each one to see it enlarged, and to vote for it by clicking “Like”. You may vote for more than one piece.  This is like the “People’s Choice” awards we do at shows locally – it won’t influence the judges, but it would be quite an honor to receive.
http://award.renecarcan.be/node/1897

Please share this with others, especially those who love original prints, and ask them to support my work in this simple way!

Harris Beach Oregon, color etching, nominated for the René Carcan International Prize in Printmaking.

The selected finalists will exhibit at a museum in Brussels, the Bibliotheca Wittockiana, a museum dedicated to book arts, book binding and related disciplines. The show opens February 15th and closes May 15th of 2018.

In another round of jurying, a panel of experts will examine the actual prints to select a printmaker for the René Carcan International Grand Prix. There are also a 1st and 2nd Mention, as well as the René Carcan Public Prize, selected by a public vote. See all of the finalists’ work here:

http://award.renecarcan.be/current_edition

I am thrilled to announce that I have been selected as a finalist for the René Carcan International Prize For Printmaking! This biennial award and exhibition is presented by the Espace René Carcan, whose mission to promote the artistic heritage of the Belgian printmaker and watercolour artist, as well as provide recognition of the art of printmaking in general. You can learn more about René Carcan’s work here.


“Last Light”, etching and aquatint, 8″ x 10″, René Carcan International Public Prize in Printmaking.

The nominated printmakers will exhibit at the Bibliotheca Wittockiana in Brussels, Belgium, a museum dedicated to book arts, book binding and related disciplines. The show opens February 15th and closes May 15th of 2018.

In another round of jurying, a panel of experts will examine the actual prints to select a printmaker for the René Carcan International Grand Prix. There are also a 1st and 2nd Mention, as well as the René Carcan Public Prize, selected by a public vote. I will let you know when you can look for the public voting process online!

UPDATE: Public Prize voting is now open!  If you visit here: http://award.renecarcan.be/node/1898
you will see a page with my 4 pieces.  There should be a “like” button next to the enlarged image.  “Like” = Vote.  You may click on each image to see the “like” button for that image. Apparently you can vote for as many images as you want, but you can only vote one time for a specific image.  NOTE: it requires a Facebook account to vote.

I love Yosemite National Park for its amazing rock formations, astonishing waterfalls, and beauty at every turn of the trail. River Bend with Half Dome is a view of the famous Half Dome formation viewed from a bridge over the Merced River.

I was out early in the morning to start a hike to one of the waterfalls that feeds into the Merced, and was taken with the cool, soft colors of the morning light, especially the blues and purples of the glacial carved rock. I knew well that these colors would change dramatically as the sun rose higher and the day grew hot. I wanted to capture this cool morning feel in an etching.


River Bend With Half Dome, 2-pate etching
Torrey Pine #1, à la poupée etching

There are a number  of ways to make an etching in multiple colors.  One approach is to use more than one plate, printing each plate on top of the previous print.  This method has inherent challenges with registering the plate and the paper so that the images line up precisely.  Add to that challenge the fact that the paper must be damp in order to pull the ink from the incised areas of the plate.  When the paper runs through the press, felt blankets cushion the process, and moisture is pulled from the paper.  The paper stretches as it runs through the press, and begins to shrink immediately as it dries. The paper shrinkage can cause the images to misalign. In sunny Southern California with our extremely low humidity most days, and this adds a significant extra challenge to the registration process. 

Consequently, I usually prefer to use a different technique to pull my color prints, a process known as à la poupée, in which I ink discrete areas of the plate with different colors and run it through the press only one time. See a previous blog, Working Out the Color Wipe: A La Poupee Printing, for more on this technique.

First plate for blues, purples and sienna in the water

I usually need large areas of color for the à la poupée process to be successful, and I could see that my planned image would have several areas that would be difficult to wipe à la poupée at the juncture of the greens and the purplesThe solution was to combine these two processes to mitigate the challenge.  I created two plates, each inked à la poupée in multiple colors.


The first plate, zinc etched in aquatint tones, will be wiped in blue for the sky, two shades of purple for Half Dome, and sienna for the shadows in the river.

Second plate for 2 greens and sienna


The second plate, also zinc etched in aquatint tones, will be wiped in dark green, yellow green and brown.

The next few pictures illustrate the plates printed in black ink, showing how each prints alone and how they align when printed on one paper.

plate # 2 in black


The two plates printed together in black

Note that the print is backwards from the plate. In order to have the final image appear as the original view, the plate must be a mirror image.  In many cases, I don’t worry about this, but for some famous and well-known landmarks, I reverse the image on the plate. Notice also the plate mark, the indentation from the paper being pressed over the plate. This mark is characteristic of intaglio printmaking processes.

Plate # 1, inked and wiped, on the press bed.
Laying paper on Plate # 2 on the press bed, after printing plate # 1.


Plate #1, inked and wiped, is placed on alignment marks on the press bed, ready for printing.  Note the 4 colors, and how the rest of the surface of the plate is wiped “clean” so that it will be white in the print.


When plate #1 has run through the press, the paper is captured under the roller to prevent it moving.  The second plate is carefully placed on the press bed on the alignment marks, and the paper lowered onto it.  Then the felt blankets are lowered and the second plate is run through the press.

Once the plates are completed, the color proofs are made.  There are usually a series of proofs establishing the precise color mix desired for the final print.  These early proofs are usually destroyed.  The first proof that captures what I am going for is called “bon à tirer” (literally, good to pull).  This print remains in my collection and is the print all others should match.  After that, printing of the edition can begin.

The resulting print, River Bend with Half Dome.

River Bend With Half Dome, 2-pate etching

As with most of my editions in the last 25 years, I only print a few images in the edition, and  then I put the plate away.   I keep very meticulous records of what has been printed. Should those early images find homes, then I will pull out the plate and print again. In the meantime, I am on to the next creative challenge!

River Bend with Half Dome is currently on display in “One Foot in the River” at the Lillian Davis Hogan Gallery at St. Mary’s University of Minnesota in Winona, MN


Sagami-wan, etching and aquatint, ©1978, Julianne B Ricksecker


As an artist who works primarily on paper surfaces that need to be framed for protection from the elements, I have long been concerned about using archival materials for framing and handling: museum or rag mats, archival clear wrap for matted work that will be displayed in bins.

But as a young artist starting out, I relied on the expertise of the framers I took my work to for advise on framing decisions.  I recently learned from experience that at least one of those framers led me in the wrong direction.  In her defense, she might have been giving me industry standard counsel at the time, but I have a piece of art that clearly shows the error of the technique.  It is also interesting that there are two pieces, framed in the same way at the same time, and only one of them suffered acid damage. I have to guess that the different rag content of the two printmaking papers caused diverse outcomes.

I am no longer a young artist, and some of my work has been in frames for a long time.


The two particular pieces that I looked at this week were framed about 35 years ago. When I pulled them out of storage to check them out before sending them out on exhibit, I noticed that the glass looked smeared. However, cleaning the glass did not help.  I was puzzled about why the inside of the glass would look dirty, but I opened up the frame to clean it.

Untitled (ring around the moon), etching and aquatint, ©1978


dirty glass

I found a milky deposit on the inside of the glass everywhere that the black rag mat touched the glass, and the black ink from the print was offset on the glass in the same milky deposit. I am not sure what this is and am not sure it would have been so apparent if the deposit hadn’t been whitish and the mat pure black.

closeup of milky deposit


deposit wipes off


milky film on glass – Sagami Wan


milky deposit and offset image on glass
acid damage on image from framing with non-archival materials

No part of the print was touching any non-archival surface.  Behind the print was a 2-ply rag mat that was in perfect condition.  The black  mat, which was supposed to be acid free (I don’t remember if it was “rag”), was in perfect condition.  But the foam core that was used as a backing board behind the 2-ply rag mat “barrier mat” was not an archival material.  It was believed that the barrier mat would protect the print from the acidity of the foam core. I can only guess that the damage to the print, and possibly the scum on the glass, was the result of  out-gassing of some kind from that foam core backing. The out-gassing, remaining inside the frame package, was able to impact the paper of the print wherever the was air space between the glass and the print. It did not, however, seem to injure the rag mats.

What I noticed next was the shocker.  I lifted the mat from the print, to see if the mat was causing an acid burn on the paper. I found that the mat had perfectly protected the paper, but where the mat window was open and the print exposed to the air behind the glass, the paper was burned yellow.

I found it interesting that the second print, framed identically at the same time, did not experience this damage. The glass had the same off-set of the image and the same deposit where the black mat touched the glass.  The printmaking paper of the second print has a higher rag content, and apparently was less susceptible to environmental damage.

Needless to say, after cleaning the glass, I replaced the backing boards with newer acid free archival foam core backing boards.  And replaced the burned print with a different impression from the edition, which has been stored flat and unframed.

This is one example of what acid damage from non-archival  framing might look like. It’s highly unlikely that I will be around to check on them in another 35 years, but I am hoping that current “acid free” and “archival” materials are truly superior to the framing materials and understanding of1981.  I have not yet destroyed the burned print.  I am thinking about  experimenting with it.

Technical notes: The paper that was “burned” was Arches printmaking paper and in the 70’s, I believe it was 40% rag.  The paper that did not “burn” with the same framing treatment was Rives BFK, which I believe has always been 100% rag.


untitled monotype doodle

I signed up to demonstrate printmaking at the San Diego County Fair.  Watching me draw a new plate for etching is a little like watching grass grow, and isn’t very engaging for Fair attendees, so this year I wanted to do a demo of monotype printmaking. It is a little more painterly and more important, it works up faster.


I decided to use the opportunity as an excuse to work with a set of inks (Akua) designed especially for monotype printmaking as a non-toxic watercolor ink.  I had purchased them a couple of years ago and really hated how they handled, compared to my usual process, but I had seen online that others were using them successfully.  So I determined to do some practice sessions in the studio and try to make friends with this material. (Art materials are expensive!)


My first attempt was just doodling. Ok, I can see some possibilities here. It looks very grainy, which I am not fond of. With heavier ink and more pressure, it might work for me.


Bench on Coast Walk, monotype


Second attempt, on the press this time, got some nice ink coverage but the pressure was very high to get this smooth look. It was hard work to pull the plate through the press, even on 25:1 gear ratio.


Painted the same composition and used a little less pressure – far too pale and grainy! That is why it is called experimenting!


Tried another image – with tighter pressure. This image works well with the grainy quality of the ink.  After adding ink to darken select areas defining the rocks on the beach, and running through the press again, this was a passable result.


I feel encouraged that I might make friends with this ink yet!  I try one without the press.   In the demo situation, I will have to print by hand, using a spoon or a baren to apply pressure.
Although I re-inked and overprinted several times to get to this end, I felt good about the possibilities after printing this image. I turned to making sketches for the demo days.


Since I paint the image on clear plexiglass, it is possible to lay the plate directly on the sketch to guide color application. This sketch was used for the second demo.


On demo day, I had some materials for kids (and parents and teachers!) to play with – so in the end, the first monotype at the Fair did not get completed.  I covered the partially painted plate with a second plate and clipped them together.  I had heard that these Akua inks stay wet for several days, so I thought, “Why not?  I’ll print it at home tomorrow.”


It was a couple of days before I got back to it.  Even though I knew it wasn’t “finished”, I thought I better print just to see whether the ink would still work.


I was very pleased that the film of ink was still wet enough to transfer pretty well even after 48 hours.


The composition needed more work, however, so I added a series of layers of additional colors, printing repeatedly until I felt happy with the result.


For my second demo day, I had another flower image. This time the demonstrator table (and the demonstrator!) were in sun a good part of the time.  The ink felt like it was drying very fast in the heat and sun, so  I printed at the end of two hours.


Alignment for the printing is pretty simple with the clear plexiglass, however it was still useful to tape the paper to the plate for ease and speed of repositioning the paper for subsequent printing.


By adding more color layers, the grainy quality that I don’t like gives way to a richness of color that I do like.

Note that, once I began darkening the background around the flower petals, I actually drew with marker on the back of the plate, tracing the precise placement of some elements as they were already printed.

While the audience thought this looked pretty nice, I know that the “magic” of seeing the print pulled was a big influence on their impression!  I took it home and added more layers to enhance the composition over the next few days.

Titleld “Dallas’ Cactus Blossom” after the homeowner in whose beautiful garden I found this lovely specimen.


MacKerricher Beach. etching


If you have been following this blog, you have watched the development of a zinc plate though polishing, beveling, line drawing etch, tonal or aquatint etch, spit bite aquatint, and using paint markers and grease pencils as acid resist.


You have seen a number of proofs of the image along the way, called “Stage Proofs” – proving the plate at different stages of development.


MacKerricher Beach, Second State Proof


The final stage of development is working out the color wipe.   The plate could be printed with black ink only, resulting in shades of grey, or inked in all one color, such as sienna, for a monochromatic image of shades of that color.

I print in a technique called “a la poupee” – a French term literally translating as “by the dolly”. It means dabbing and wiping different colors on different parts of the plate.

P1170516

applying first color


Many of my etchings are done this way, where colors are applied to sections of the plate and wiped separately, then the all of the colors printed at once on the etching press.

Wiping first color

It is possible to wipe a base color and then apply another color over the top of it for a blended effect, and to bring color from one area of the image into another area. I do a combination of these for most of my color wipes.


On MacKerricher Beach, I started with two blues, one that was mostly Payne’s grey for the cloudy sky, and another for the waves coming through the gap.  The rocks and cliffs were all wiped with sienna, and the trees and bushes with Cascade Green.  The resulting print was nice but didn’t quite “pop” for me, so I remixed the colors a little, but more importantly, added a fifth color, a darker brown.


In this version, the foreground rock is wiped with a dark brown after the cliffs and the haystack rock are wiped with sienna.  Some of the dark brown is wiped over the sienna at the base of the cliffs and blended into the sand.


A new green mix was applied to the tree, and the dirty rag from wiping the tree was used to dab a little green onto the haystack rock, the top of the cliff, and the side of the foreground rock.  Then a clean rag wipe over all completes the color wipe.


This color combination is satisfying, and the placement of the layered green and brown is just what I was looking for.  Now the challenge will be to make the overwipe layer areas similar from one print to the next.  

Great attention to detail will be necessary to match the bon a tirer with subsequent wipes.  While I don’t expect them to be identical, it will be possible to wipe too much – leaving the image t0o pale – or to dab the colors onto a larger or smaller area, creating a different look which may not be as satisfying.  These prints are usually destroyed, although if it is interesting in it’s own right, just different from the edition, it may survive as an “artists proof”.final print - 5 colors


Spit bite: painting acid directly onto the Aquatinted plate


In the last post, I talked about creating aquatint tones using hard ground and paint markers to cover the plate and protect it from the acid.  In another process, the acid can be painted directly on the plate to create subtle effects and soft edges.


The plate is covered in an aquatint ground (a ground of tiny speckles that will result in very small raised points of metal when etched.  See How Tones Are Created in Etching for more detail on this ground.)

Next, any parts of the plate that need to be protected from the acid are covered in a solid acid-resistant ground, such as liquid hard ground. This appears coffee-colored in the above photo.

Now the fun begins.  Using a weak solution of acid and an animal hair brush, the prepared plate is literally painted with acid. Acid can be stroked onto the plate, dripped onto it, or dripped into puddles of water that have been painted onto the plate.

Because the acid is weak and is depleted quickly in this process, areas that are to retain ink need to be painted over and over with the acid, until the etch is deep enough to hold the desired amount of ink.  It is not possible to tell just

Spit bite plate
The plate is stained from the acid

from looking at the plate exactly how deep the etch has become, so it is important to have a sense of how many times a given area has been painted with acid in order to gauge progress.  The application of acid to the plate in this manner results in the plate appearing stained, but the varying color of the stain does not relate closely to the eventual tone in the print.

When the artist determines that the spit bite is deep enough, the plate is flushed with water, and dried.  All of the grounds are removed, and the plate is inked, wiped, and printed to check on progress.


Using paint marker for highlights in the waves


For this image, however, I chose to continue to develop tones for areas representing sand and surf.  I used paint marker to protect the highlights in the waves.


Another technique I like is to draw over the aquatint ground with a china marker (grease pencil).  This is another way to create subtle gradations of tone in the aquatint.

Using a china marker for subtle gradations in the sand


Again, development of tones proceeds by soaking the plate in acid,  then using paint marker and china marker to cover more of the plate and soaking in acid again.


Here you see continued development of tones for sand and waves. Eventually the areas still exposed to acid are very small.


Eventually the area being etched is very small.


Finally the grounds are cleaned from the plate.  The bare plate gives some idea of how the plate will print if you look at how light reflects from the surface.  The spit bite areas are somewhat deceptive because of the irregular acid staining.

The bare plate after grounds are removed.


Next step is to ink and wipe the plate, and print it on the etching press to check progress. Here is a view of the press, which has rollers above and below the traveling bed. Note the felt blankets folded up out of the way, waiting for the plate and paper to be set upon the bed.


The inked plate on the press bed.


The plate is inked and the surface is wiped with rags.  Now you can see more clearly how the acid has affected the plate, especially in the spit bite areas.

Damp paper paced over the inked plate


Damp paper is placed over the inked plate, and covered with soft felt blankets. The resulting sandwich is rolled through the press.


Felt blankets (3 layers) are lowered onto the press bed.


After rolling the bed between the rollers, the pressure pushes the paper fibers into the plate to transfer the ink to the paper. Note the plate marks visible from the back side of the paper after the plate has gone through the press.


Here is the black and white proof (print) of the etched plate.  The spit bite has produced a brooding grey sky of indistinct clouds.

The next process in developing this image will be mixing colors and proofing the plate in color.


Morning Mist, aquatint

If you have ever wondered how the fine tonal areas are created in an etching, here is an example of a modern method.

The idea is to create a speckled pattern of an acid resistant material on the plate so the acid can eat around the speckles, leaving tiny raised metal points. When ink is applied and then wiped with rags, the depth of the etch determines how much ink remains on the plate, and therefore, how dark the printed tones.  In the example at left, the palest tones  resulted from a 10 second dip in the acid, while the darkest areas soaked in the acid about 15  minutes.


So what is thus mysterious speckled resist?  In modern times, we can use spray enamel paint for a quick and reliable method to cover the plate in a fine and even mist.

Aquatint ground for tone
Aquatint ground on plate
Krylon Spray Enamel
Krylon Spray Enamel for making aquatint ground

In the image at the left, you can see that the coverage of enamel is at 40% or so. Coverage in the range of 40% – 60% will work well.

Painting hard ground

Next, the same liquid wax and asphaltum ground that was used to cover the plate for the line etch is now painted on the plate to protect areas that will have no etched tone.


IMG_2689

Sometimes very fine brushes are used to work delicate details.

When the areas of the plate that need to remain “white” are protected with ground (which looks coffee-colored in the photo), the plate is ready for an acid soak.


The plate will be bathed in the acid repeatedly to achieve a variety of tones.  When the plate is removed from the acid, it is rinsed with water and dried.  Then additional ground is placed on the plate to protect the tones just etched before it is returned to the acid to continue etching some areas to a deeper level. The longer the aquatint soaks in the acid, the darker the tone will print.

IMG_2692


I could use the regular liquid hard ground for this purpose, but for complex tone development, I find it easier to visualize the tones I have already etched if I use paint markers in different colors to protect the plate for subsequent etches in the series.IMG_2693


I start with a general plan of how many times I will return the plate to the acid, and for how many seconds or minutes each acid bath will be.  This plan comes from years of experience, a sense of how potent the acid bath is, and noting how warm the studio is.  I keep notes of how long the plate has been in the acid as I progress, so that I can keep track of how long the still exposed areas have been etched in total. Many of my plates have 6 – 10 separate acid baths during this phase of development, and it is easy to forget just how many times the plate has soaked, and for how much time.

Finally, all of the enamel, hard ground and paint marker is removed from the plate, and the plate is inked and printed to check progress.

The acid has etched between the speckles of enamel, leaving a high point at each place where enamel adhered to the plate.  When inked and wiped, the plate will hold ink between these high points.  The more difference between the high points and the depth of the etch, the m

MacKerricher Beach, Second State Proof

ore ink the plate will hold.  If you look closely at an aquatint print, you will see the fine pattern of white spots from these high points of metal.

I could  scrape or burnish some of the aquatint areas to give more subtle variations in the tone. Burnishing is like lightly erasing – is will make the aquatint print in a lighter tone.

Note that there are a few unintended marks in the “sky” area – this is where the hard ground was not thick enough and allowed the acid to seep through; this is known as “false bite”.  If it does not work with the image, it will be scraped and burnished to clean up the area.

The next step will be to create a brooding sky with a technique called “spit bite”, and some sand in the foreground with surf tumbling up between the rocks. That will be for my next blog!

Last time I wrote about preparing a zinc plate to begin the etching process – the work that needs to happen before image making even begins.

Grounded plate
Plate covered with ground

Today I’ll show how an image is etched into the plate. Since the etching literally occurs by soaking the metal plate in nitric acid (hence the term “etching’), the first order of business is to protect the plate from the acid. As my resist, I use a liquid ground made of asphaltum and wax, which dries hard and smooth.


Preliminary Sketch
Preliminary Sketch of MacKerricher Beach


Transferred Sketch
Sketch transferred to grounded plate

I usually work out the composition in sketches first, and may make a full size drawing.  The basic outlines of the drawing can be transferred to the plate using a transfer paper, similar to a dressmaker’s carbon.

Drawing with the needle


The line drawing is done with a needle, scraping through the ground with the fine point.  The idea is only to expose the metal plate to the acid, not to scratch the plate.

IMG_2626
Developing drawing with cross hatched lines


Whether using a transferred outline, or drawing freehand, the needle is used to draw lines and to create shaded areas using cross-hatched lines. The drawing is sensitive and delicate, using the transfer drawing as a general guide only

Needle drawing on plate


Soaking in nitric acid
The first etch: soaking line drawing in nitric acid


When the drawing is satisfactory, the plate is soaked in nitric acid for 10 – 40 minutes, depending on the strength of the acid and how deep I desire the etched lines to be.


Etched plate, line drawing


When the etching is complete, I clean the ground from the plate, and print a proof to check the etch so far.

I scrape ink over the plate, forcing the ink into the incised lines.  Then I use rags to wipe ink from the surface of the plate until all the un-etched surfaces are clean.

Next I place the inked plate on the bed of the etching press.  Damp paper is placed on the plate, and several layers of felt are laid down on top of the paper.  This sandwich is rolled through the press, which has rollers above and below the press bed, squeezing the fibers of the paper into the incised lines on the plate.

Printed image and inked plate on press bed

When the paper is lifted from the plate, the image has been transferred to the paper. Note that the printed image is the reverse of the drawing.  When designing an image of a well known landmark, I reverse the drawing so that the final image will be familiar to the viewer.


Next time, I will show how tones can be etched into the plate. I’ll add a cloudy sky, surf, and sand to the image.